Kill two birds with one sound!

Kill two birds with one sound!

If you try to say two or more things at once, usually you end up saying nothing, they say.. But what follows are examples of very effective storytelling, where sound effects were used to tell two things at the same time – well thought out and very cinematic, watch the examples below:


Great Gatsby

The Great Gatsby (2013)

We can see the first gun shot, but the second one we can only hear. This is really powerful, because it combines sounds of splashing water as well as the gunshot itself. Nice, elegant and very effective example of killing two birds with one sound.

Godfather

Godfather (1972)
Godfather (1972)

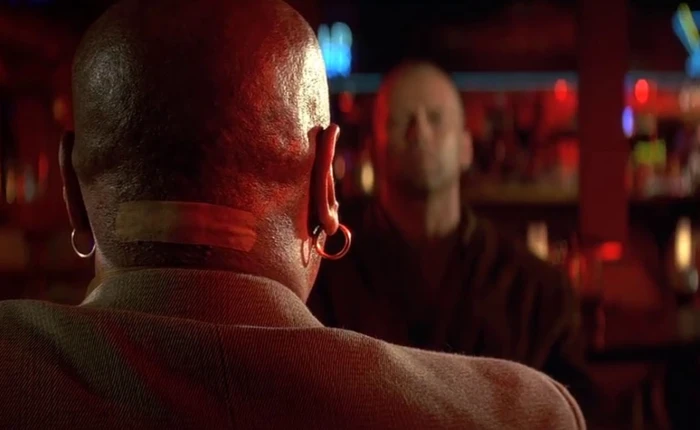
This scene takes place in the Bronx. At the very beginning it is established, that somewhere in the neighborhood is an elevated train. We can hear sounds coming from the train several times during the dialogue between Michael and Solozzo. What follows now is an excerpt from article called Stretching Sound to Help the Mind See, written by Walter Murch for filmsound.org:

Sounds, however, that do not relate to the visuals in a direct way function at an even higher level of dimensionality, and take proportionately longer to resolve. The rumbling and piercing metallic scream just before Michael Corleone kills Solozzo and McCluskey in a restaurant in “The Godfather” is not linked directly to anything seen on screen, and so the audience is made to wonder at least momentarily, if perhaps only subconsciously, “What is this?” The screech is from an elevated train rounding a sharp turn, so it is presumably coming from somewhere in the neighborhood. But precisely because it is so detached from the image, the metallic scream works as a clue to the state of Michael’s mind at the moment — the critical moment before he commits his first murder and his life turns an irrevocable corner. It is all the more effective because Michael’s face appears so calm and the sound is played so abnormally loud. This broadening tension between what we see and what we hear is brought to an abrupt end with the pistol shots that kill Solozzo and McCluskey: the distance between what we see and what we hear is suddenly collapsed at the moment that Michael’s destiny is fixed.

Again, the sound here helps to establish the place/environment, but at the same time helps to convey what goes through Michael’s head.
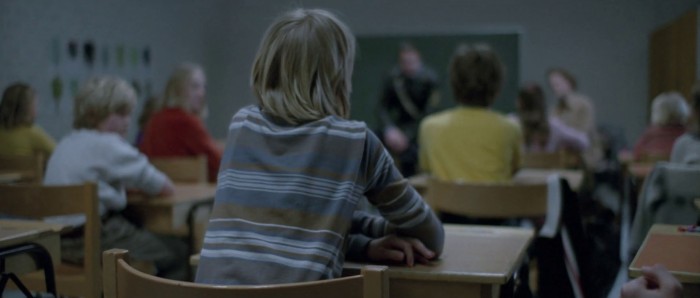
Hesher

Hesher (2010)
Hesher (2010)

This scene was actually a theme of the very first article written for Cinema Shock, you can read more about this scene here, but just briefly: The sound (thunders and lightnings) describes how T.J. feels and at the same time, they work as a sound bridge to the following scene. This is genius! If you’re a filmmaker, I hope this article sparked some new ideas. I think trying to kill two birds with one stone is almost always a good idea. You can do it with sound, you can do it with camera or you can even try to combine camera movement with sound effect. P.S. I am currently working on a short project, where together with sound designer Matt Cavanaugh we try the last-mentioned: to combine a camera movement with sound effect. I’m looking forward to share it here in the near future!

Mystery shots

Mystery shots

This is an interesting type of shot that I firstly noticed in Pulp Fiction. The camera focuses on characters’ back while making the rest out of focus. That means we don’t see the facial expressions (of our character in focus), we can’t read any emotional cues from his face. Now, it’s important to mention, that there is no counter-shot, we stay in this type of shot for the whole time – this builds a tension and bit of a drama.

Subconsciously you are asking yourself: Is he a good guy, bad guy? Is he harmless or threatening? You can guess by color and intonation in his voice, but still you are missing the visual cues.

The first example comes from introduction of Marsellus Wallace in Pulp Fiction. Since this is the first time we see his character, it’s quite difficult to guess what type of character he is and thus for several minutes he remains covered in mystery for us.. And by the way, I think this is one of the keys to a good storytelling – lay out questions and hold viewer’s curiosity as long as possible, reveal the answer (hopefully a surprising one and in a way that will be unexpected by the viewer), than lay out new questions and repeat the process…

Let the Right One In (2008)

The second example comes from Swedish movie Let the Right One In. We are in a classroom, where a policeman gives a short lecture. The only kid interacting with him is our main character Oskar. Again, his back are in focus, while everything else is out of focus. You would expect a rack focus on the policeman, or counter shot revealing the face of Oskar, but none of that happens.

Here this technique serves a different purpose, we saw his face already, so it’s not a mystery any more. I think that in this case this simply helps to build a tension in the classroom. (Later on, you’ll learn that Oskar gets often bullied.)

Do you know about any other examples? If yes, let me know, I’ll be more than happy to add them here…

Scene coverage in Road to Perdition

The main action is happening between Paul Newman and Daniel Craig’s characters, so it kinda makes sense to draw an “action line” between them and cover the scene from one side of the line. This way you’ll avoid problems later in the editing.

Scene coverage in Road to Perdition 01

From the picture above you can see, that most camera setups are located on the right side of the line. This side was probably chosen due to technical considerations (limitations of the location etc.)

The scene starts with a high angle master shot of all characters, this clearly shows where each character is seated. Now, we can freely cut to individual characters without confusing the viewer… unless we cut to the camera placed on the other side of the action line.

Scene coverage in Road to Perdition 02

In the third shot the camera physically jumps to the other side of the line. However, it doesn’t feel wrong. The reason is that you could get a similar shot while staying on the same side if you’d use a telephoto lens (instead of wide angle).

Scene coverage in Road to Perdition 03

The next jump is between shots 4 and 5. In this case, the trick with longer focal length won’t work anymore. You could eventually avoid this jump by making a new action line (right part of the picture above), but in this case I believe there is no reason to do that: There is almost no interaction between the two characters in the shot (this is basically a reaction shot), therefore the original action line remains the same (that is the one between Paul Newman and Daniel Craig’s characters).

Cutting to the other side of action line feels usually very disruptive, but in this case it works fine. The previous shot is more than 13 seconds long, that’s long enough to memorize where everybody is seated, so when we cut to the other side, we won’t feel confused. This applies to reaction shots 6, 8, 16, 17 and 22 as well:

This scene is a beautiful example of jumping from one side of the action line to the other (and thus breaking the 180 degree rule), without making the viewer confused (which might be the intention in some cases).

I’d love to hear Sam Mendes talking this scene through in some audio commentary, particularly the last shot, where camera follows and keeps in focus Tom Hanks with Paul Newman, while making Daniel Craig’s character increasingly out of focus…

P.S. Have you noticed the continuity error between shots 6 and 7?